

Photography
There’s always room for improvement where item photography is concerned. There’s always something that can be changed or improved upon.
The most important thing to remember when doing your photos for your items is that the customer cannot hold the item, they can’t touch it, or smell it…they have no reference for the object other than what YOU as the shop owner give them.
You have to convey texture, size, shape, all in the expanse of a few photos. This sometimes seems like a daunting task. But we’re going to break it down into a few important tips for today’s workshop.
.jpg)
Camera
Any camera will do the trick. Of course the higher the resolution picture it takes, the better. Also, if you have a tripod, use it, if not, think about getting a tripod. It really helps to make sure your photos don’t come out blurry, especially considering you won’t be using your flash
Lighting
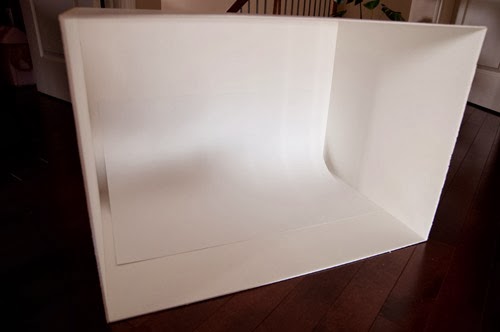
Avoid using your flash! It creates glare and heavy shadows, plus, it can wash out the color of your fantastic items. You’ll want to try and use either sunlight (indirect morning sunlight is the least harsh) and/or a light box if you can. And don’t worry, a light box is not an expensive investment. In fact, you can make one really cheap and there are a ton of tutorials around. Just google search “light box tutorial” and I’m sure you’ll find a ton of them.
Clarity
Crisp clear photos are a must! We want all of the potential buyers out there to know that our items are well made and the only way we have to show them is through our photos. Make sure that your photos aren’t blurry, and that they’re well lit. Natural light works well for some, while others, prefer a lightbox. If you need to adjust the colors run them through a photo editor and play with it to see how you can get the best crisp looking photos you possibly can. You don’t need fancy equipment.
Point of view
Angle your photos. Make them interesting. Crop them down, play around with different props. Show your customers every angle of your gorgeous piece.
Show them your goods
NO NO…not THOSE goods…the items you’re trying to sell. Make them look as good as possible. Show them how they look on a live model if it’s something that can be worn. If it’s housewares…show it in the setting like it is about to be used. You get the point. Make them say, “OH! I have to have that!!”Don’t Overdo
Keep it fairly simple. Use a prop or two if you wish, but don’t crowd the area in frame. The focus should be the item you’re trying to sell. Also, if you want your items included in treasuries with the potential of being on Etsy’s front page, you should keep in mind that most of the items featured there have a white, neutral, outdoor, or black background. And, let your items speak for themselves, no need to add text or borders.

Composition
Show everything! Since your customer can’t hold the item, you need to show a variety of angles, play around and have fun with different backdrops and angles. (For backdrops plain or neutral are best. You need at least one good close-up and one good shot of the entire item.
Editing
Once you’ve taken these lovely photos, chances are they’re still going to need a bit of tweaking. If you don’t have Photoshop, then GIMP is a free to download program that works rather well (It’s what I use) Crop your photos. If you crop them to a 1000x1000 pixel square you can be sure of what will show on the preview of the item.
The main question to ask yourself on photos is “Does this photo look like the ones on Etsy’s FP?” If it doesn’t…don’t worry, keep working. That is one thing that I am constantly trying to improve is my photography of my items. I don’t think it can ever really be perfected. It’s a constant process and learning experience for us all.
Here are a few helpful links:
✩How to Make and Use a Light box to Improve Your Product Photography
www.handmadeology.com/how-to-make-and-use-a-light-box-to-improve-yo...
✩Studio Quality Photography With a $12 Setup
www.handmadeology.com/studio-quality-product-photography-with-a-12-...
If you missed any of our posts in the Improving Your Etsy Shop Series you can find them here:
Don't forget to join us next week for week 4 where we'll discuss Tagging your items.
As always don't forget to follow me on Facebook, Twitter, Google+, Pinterest, LinkedIn, and Etsy. Sign up for our Newsletter and don't miss any of our blog posts, shop updates, or exclusive Newsletter subscriber discounts and offers.

Thanks for this post~ I've been thinking of getting a lightbox to help with my photographs, so this is very helpful. And I use Gimp, too, it is fantastic!
ReplyDelete